Applies to:
In Windows 10, version 1703 and later, the Windows Defender app is part of the Windows Security.
Settings that were previously part of the Windows Defender client and main Windows Settings have been combined and moved to the new app, which is installed by default as part of Windows 10, version 1703.
Important
Disabling the Windows Security Center service will not disable Windows Defender AV or Windows Defender Firewall. These are disabled automatically when a third-party antivirus or firewall product is installed and kept up to date.
Warning
If you do disable the Windows Security Center service, or configure its associated Group Policy settings to prevent it from starting or running, the Windows Security app may display stale or inaccurate information about any antivirus or firewall products you have installed on the device. It may also prevent Windows Defender AV from enabling itself if you have an old or outdated third-party antivirus, or if you uninstall any third-party antivirus products you may have previously installed. This will significantly lower the protection of your device and could lead to malware infection.
See the Windows Security topic for more information on other Windows security features that can be monitored in the app.
Note
The Windows Security app is a client interface on Windows 10, version 1703 and later. It is not the Microsoft Defender Security Center web portal that is used to review and manage Microsoft Defender Advanced Threat Protection.
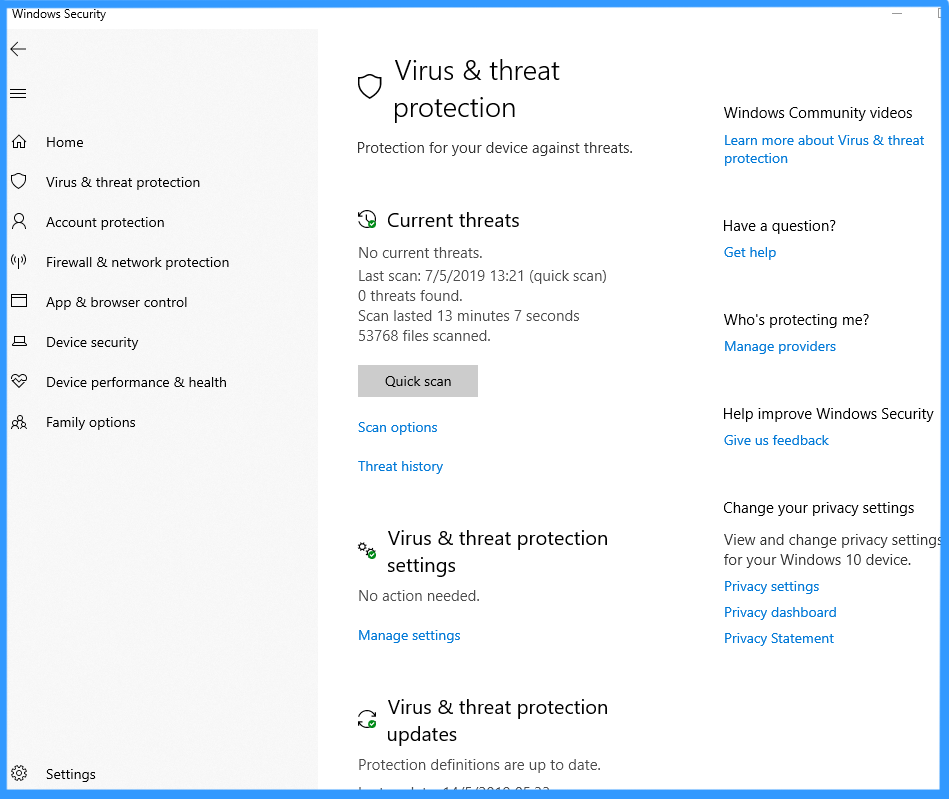
Review virus and threat protection settings in the Windows Security app:
- Open the Windows Security app by clicking the shield icon in the task bar or searching the start menu for Defender.
- Click the Virus & threat protection tile (or the shield icon on the left menu bar).
All of the previous functions and settings from the Windows Defender app (in versions of Windows 10 before version 1703) are now found in the new Windows Security app. Settings that were previously located in Windows Settings under Update & security > Windows Defender are also now in the new app.
The following diagrams compare the location of settings and functions between the old and new app

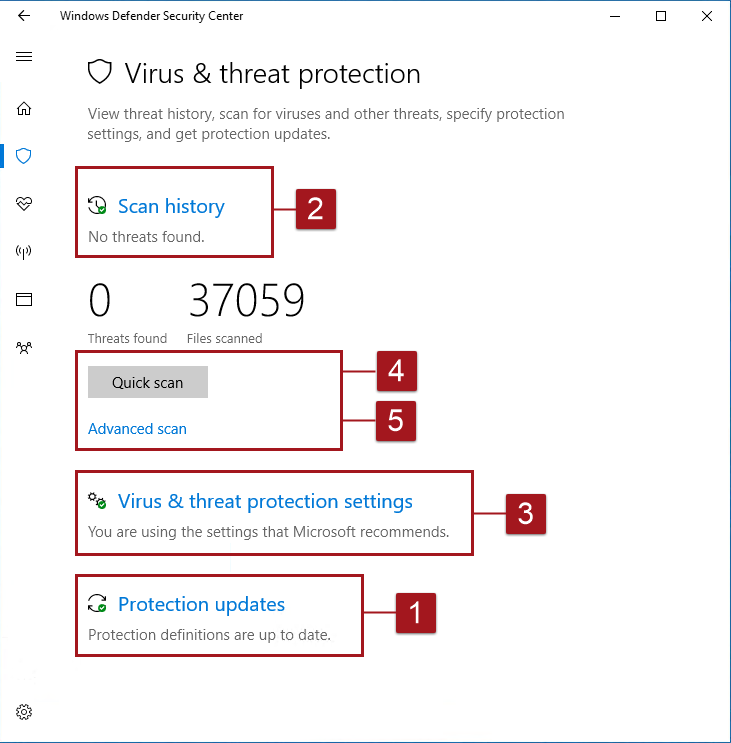
| Item | Windows 10, before version 1703 | Windows 10, version 1703 and later | Description |
|---|---|---|---|
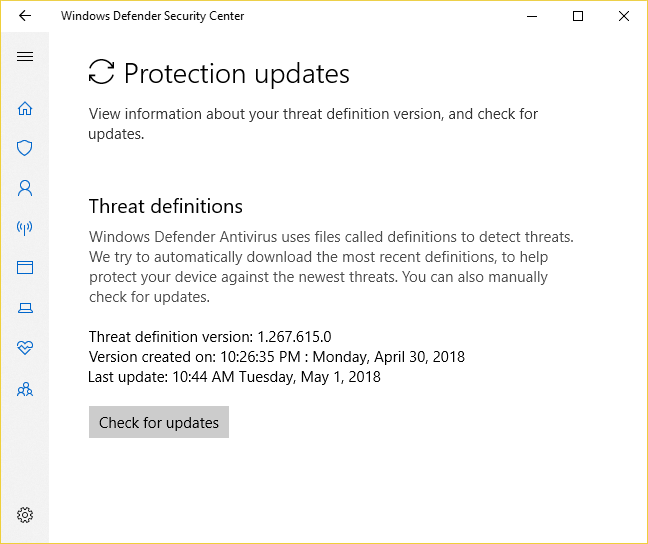
| 1 | Update tab | Protection updates | Update the protection (Security intelligence) |
| 2 | History tab | Scan history | Review threats that were quarantined, removed, or allowed |
| 3 | Settings (links to Windows Settings) | Virus & threat protection settings | Enable various features, including Real-time protection, Cloud-delivered protection, Advanced notifications, and Automatic ample submission |
| 4 | Scan options | Advanced scan | Run a full scan, custom scan, or a Windows Defender Offline scan |
| 5 | Run a scan (based on the option chosen under Scan options Common tasks
This section describes how to perform some of the most common tasks when reviewing or interacting with the threat protection provided by Windows Defender Antivirus in the Windows Security app.
Note
If these settings are configured and deployed using Group Policy, the settings described in this section will be greyed-out and unavailable for use on individual endpoints. Changes made through a Group Policy Object must first be deployed to individual endpoints before the setting will be updated in Windows Settings. The Configure end-user interaction with Windows Defender Antivirus topic describes how local policy override settings can be configured.
Run a scan with the Windows Security app
Ensure Windows Defender Antivirus is enabled in the Windows Security app
Note
If you switch Real-time protection off, it will automatically turn back on after a short delay. This is to ensure you are protected from malware and threats.
If you install another antivirus product, Windows Defender AV will automatically disable itself and will indicate this in the Windows Security app. A setting will appear that will allow you to enable limited periodic scanning.
Add exclusions for Windows Defender Antivirus in the Windows Security app
Review threat detection history in the Windows Defender Security Center app1. Open the Windows Defender Security Center app by clicking the shield icon in the task bar or searching the start menu for Defender.
2. Click the Virus & threat protection tile (or the shield icon on the left menu bar).
3. Click Threat history.
4. Click See full history under each of the categories (Current threats, Quarantined threats, Allowed threats).
|
Great. Thanks for such Information
ReplyDeleteVirus Removal Services Australia
Buy Antivirus Software